Creating an Hotspot using a Windows PC and Virtual Hotspot Router
Using the Windows utility Virtual Hotspot router you can turn an ordinary Windows PC into a router compatible with My WiFi Service.
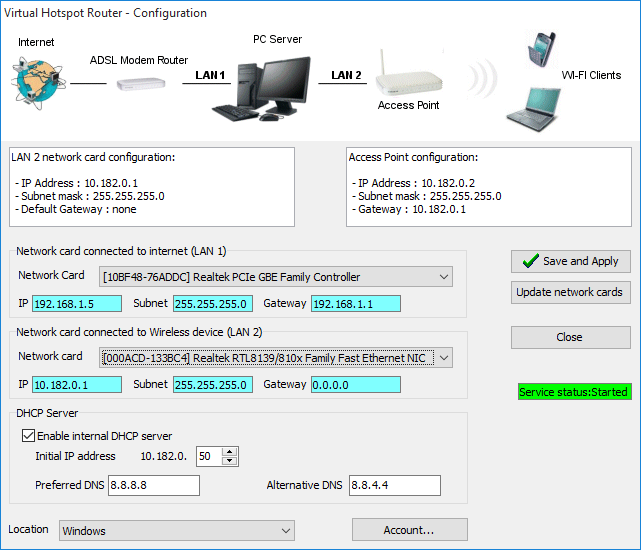
The computer on which you installed the utility must have two network adapters: the first (LAN 1) will be connected to internet via the modem/router that provides connectivity, while the second (LAN 2) will be connected to the Access Point that spreads the WiFi signal.
The choice of the network adapters
If you want to use a desktop PC to manage the hotspot, you should use the integrated network card to connect to the Internet, while for the second network card you can opt for a PCI card or a USB Ethernet adapter (choice less powerful).
If you use a laptop, you do not need to install additional network adapters because usually all laptop computers have two network adapters: one wireless and one ethernet. In this case, the wireless network card (LAN 1) will be connected to the Internet while the Ethernet (LAN 2) must be connected to the access point.
Configuration of the network adapters and access point
The adapter connected to the Internet can be configured in either DHCP or a static IP address. In the latter case it is necessary to enter also the DNS servers in the configuration.
As for the second network card (LAN 2) we will have to set:
-IP Address: 10.182.0.1
-Subnet: 255.255.255.0
-Gateway: none
While for the Access Point the configuration must be as follows:
-IP Address: 10.182.0.2
-Subnet: 255.255.255.0
-Gateway: 10.182.0.1
Installation and configuration of Virtual Hotspot Router
Virtual Hotspot Router is able to transform a PC with two network cards in a router.
The program consists of two modules: a Windows service and a configuration utility.
After downloading and installing the software, run the setup utility. On first access you will be prompted to enter the credentials of your account My WiFi Service and will see the following screen:
To complete the configuration, simply select the two network cards and click on the "Save & Apply".
After setup, and the PC restart, the Virtual Hotspot Router will start automatically. From this point on, to check the service status or make configuration changes, simply click on the icon in the Windows Tray.
Testing the Hotspot
Um den korrekten Betrieb des Hotspots zu überprüfen, verwenden Sie ein Smartphone oder ein Notebook und verbinden Sie sich mit dem Namen Ihres Standorts mit dem WLAN-Netz.
Das Verfahren für den Zugriff auf den Hotspot ist unterschiedlich, je nach der Art der verwendeten Vorrichtung:
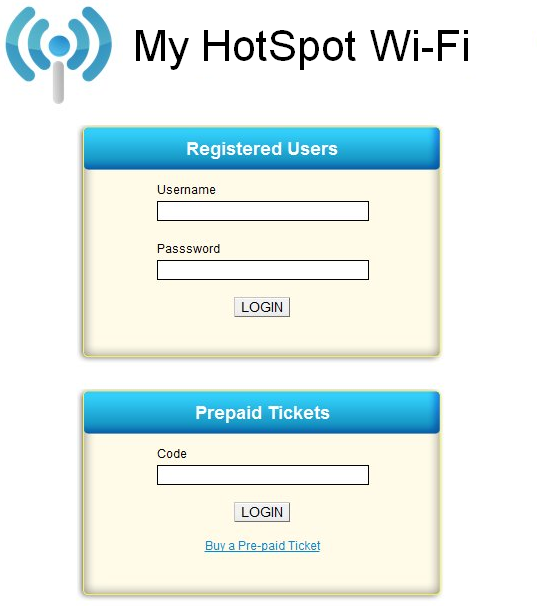
- PC/Notebook: Wird der Browser auf einer beliebigen Webseite (nicht HTTPS) geöffnet, wird automatisch zur zur Login-Seite weitergeleitet.
- IPhone/IPad: Durch die Auswahl des WLAN-Netzwerks wird automatisch die Login-Seite geöffnet.
- Android: Es wird eine Meldung angezeigt, die darauf hinweist, dass Sie mit einen Hotspot verbunden sind. Durch Klicken auf die Meldung werden Sie zur Login-Seite weitergeleitet.
Um den Test abzuschließen, erstellen Sie auf der entsprechende Seite auf dem Hauptbildschirm der Anwendung einen registrierten Benutzer (oder eine Prepaid-Karte) und geben Sie den Benutzernamen und das Passwort des soeben erstellten Benutzers ein.


